Understanding the Structure of UiPath Orchestrator
Every puzzler knows that to solve a jigsaw puzzle, you must first build the frame
To really understand UiPath, it is imperative that you understand how it is organized. At the end of the day, UiPath is just a bunch of code, written as objects, each of which has properties and methods to do stuff and interact with other objects. First let’s get a simplified, big-picture view of the UiPath command center, Orchestrator, before we delve into the details. Orchestrator is essentially a big object with other objects inside of it, like Russian nesting dolls. Let’s start at the top, then drill down.
Admin Level
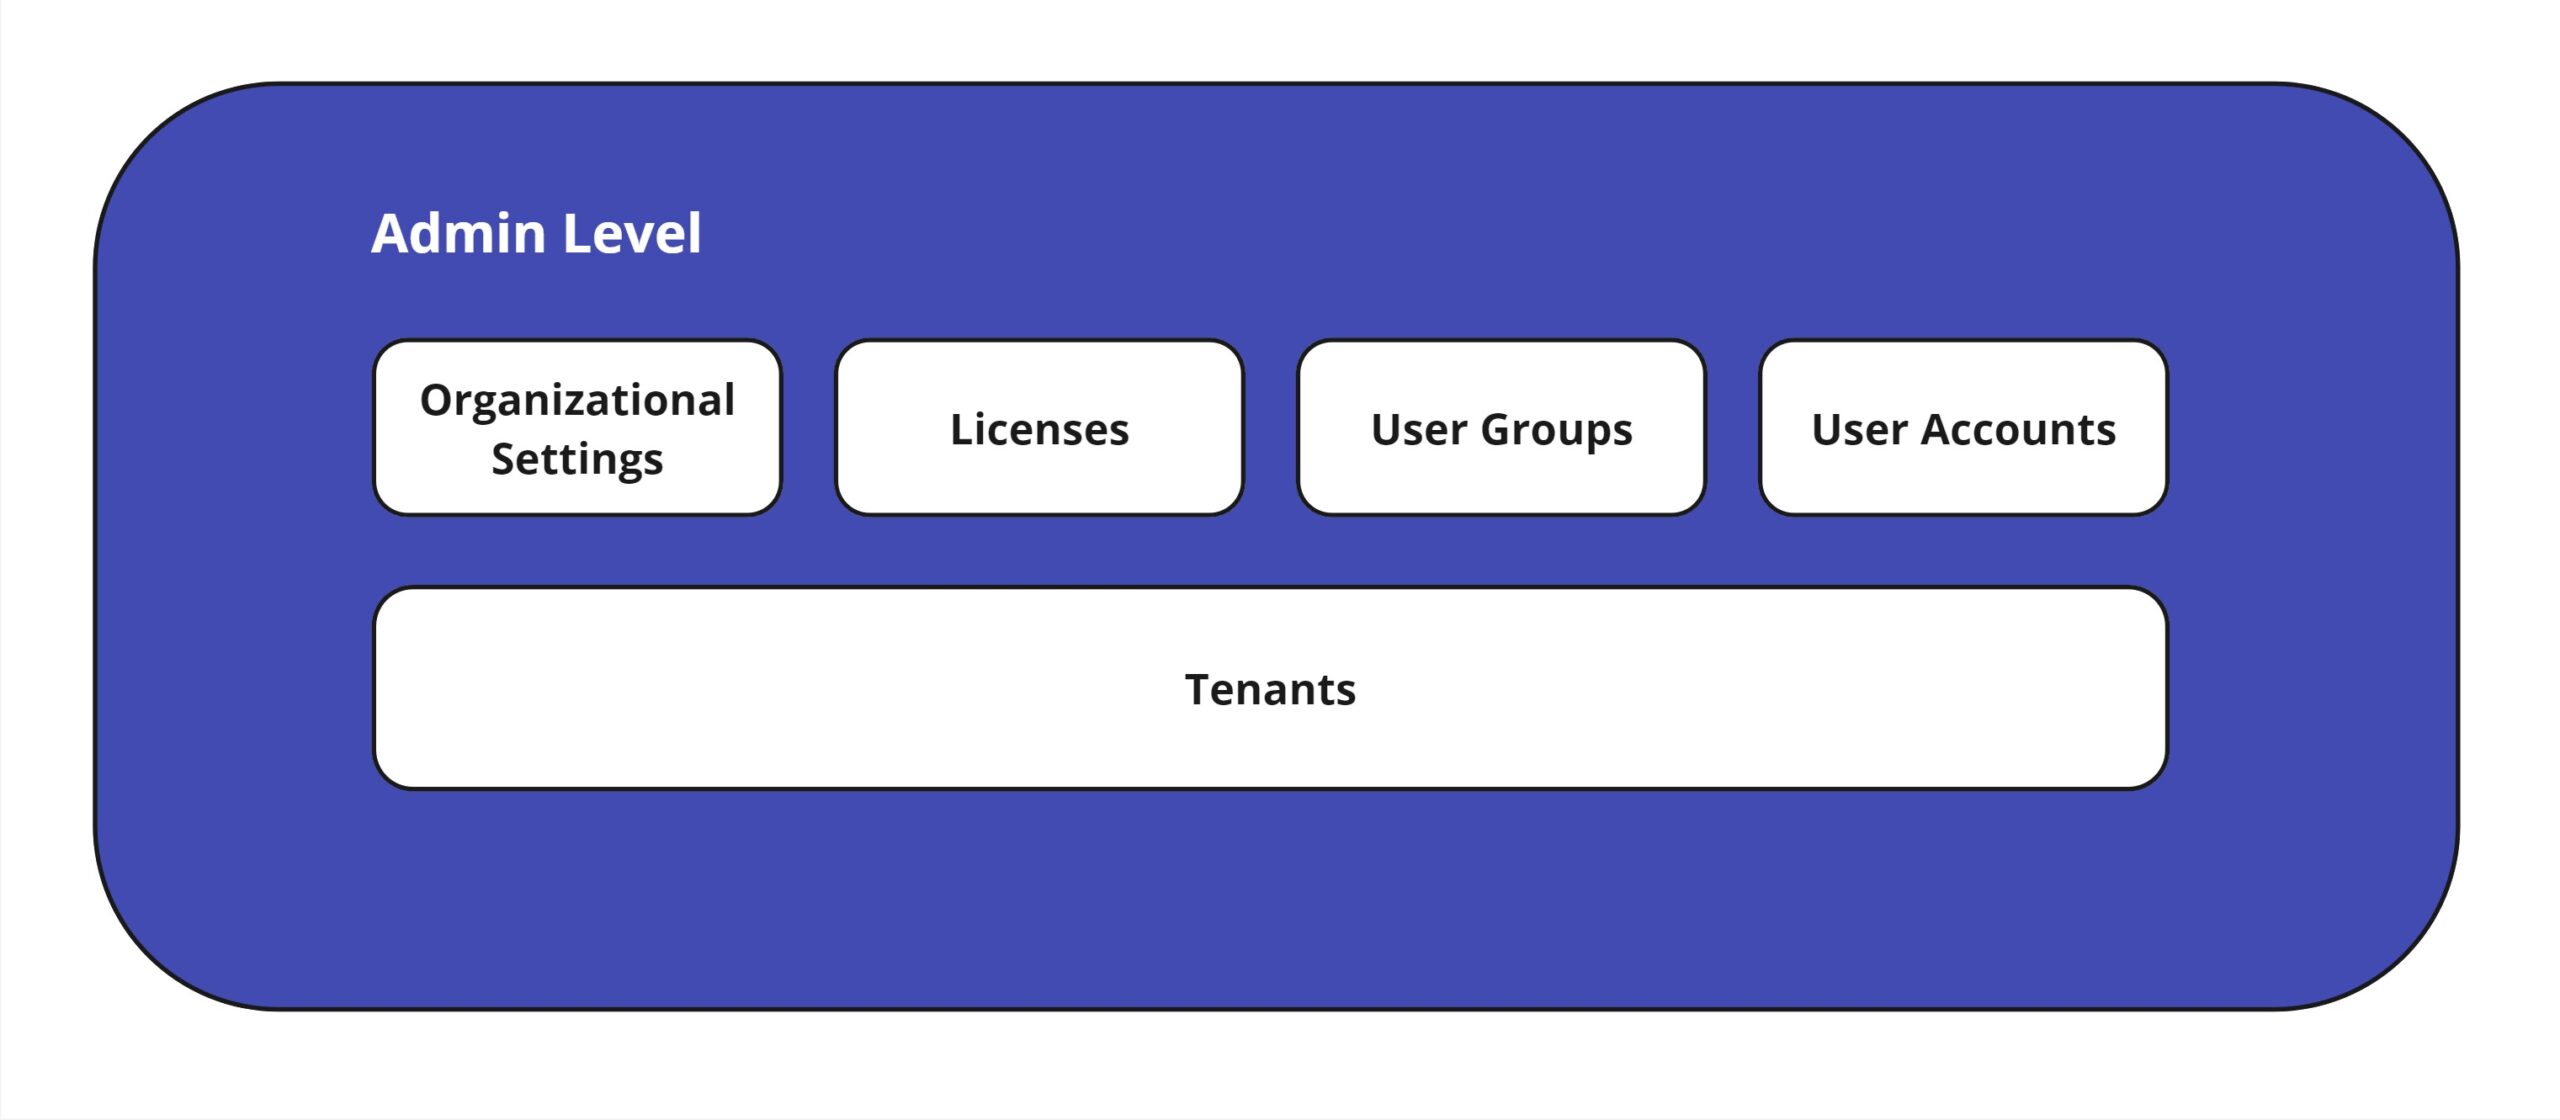
At the top-most level is the Admin Level. This is the all-encompassing object for everything at the organization/installation level. For example, here you set the name of the organization, the URL, and the Language. Here you purchase licenses from UiPath. Here you set up User Groups and assign licenses to them. This is also the entry point of all accounts, both User Accounts and Robot Accounts, and where you assign them to User Groups. Before a user/bot can be used, it must first be added here. And, finally, here is where you create a tenant, and handle high-level tenant settings such as its name and URL, which services it will have access to, and the license allocation for the tenant.
Tenant Level
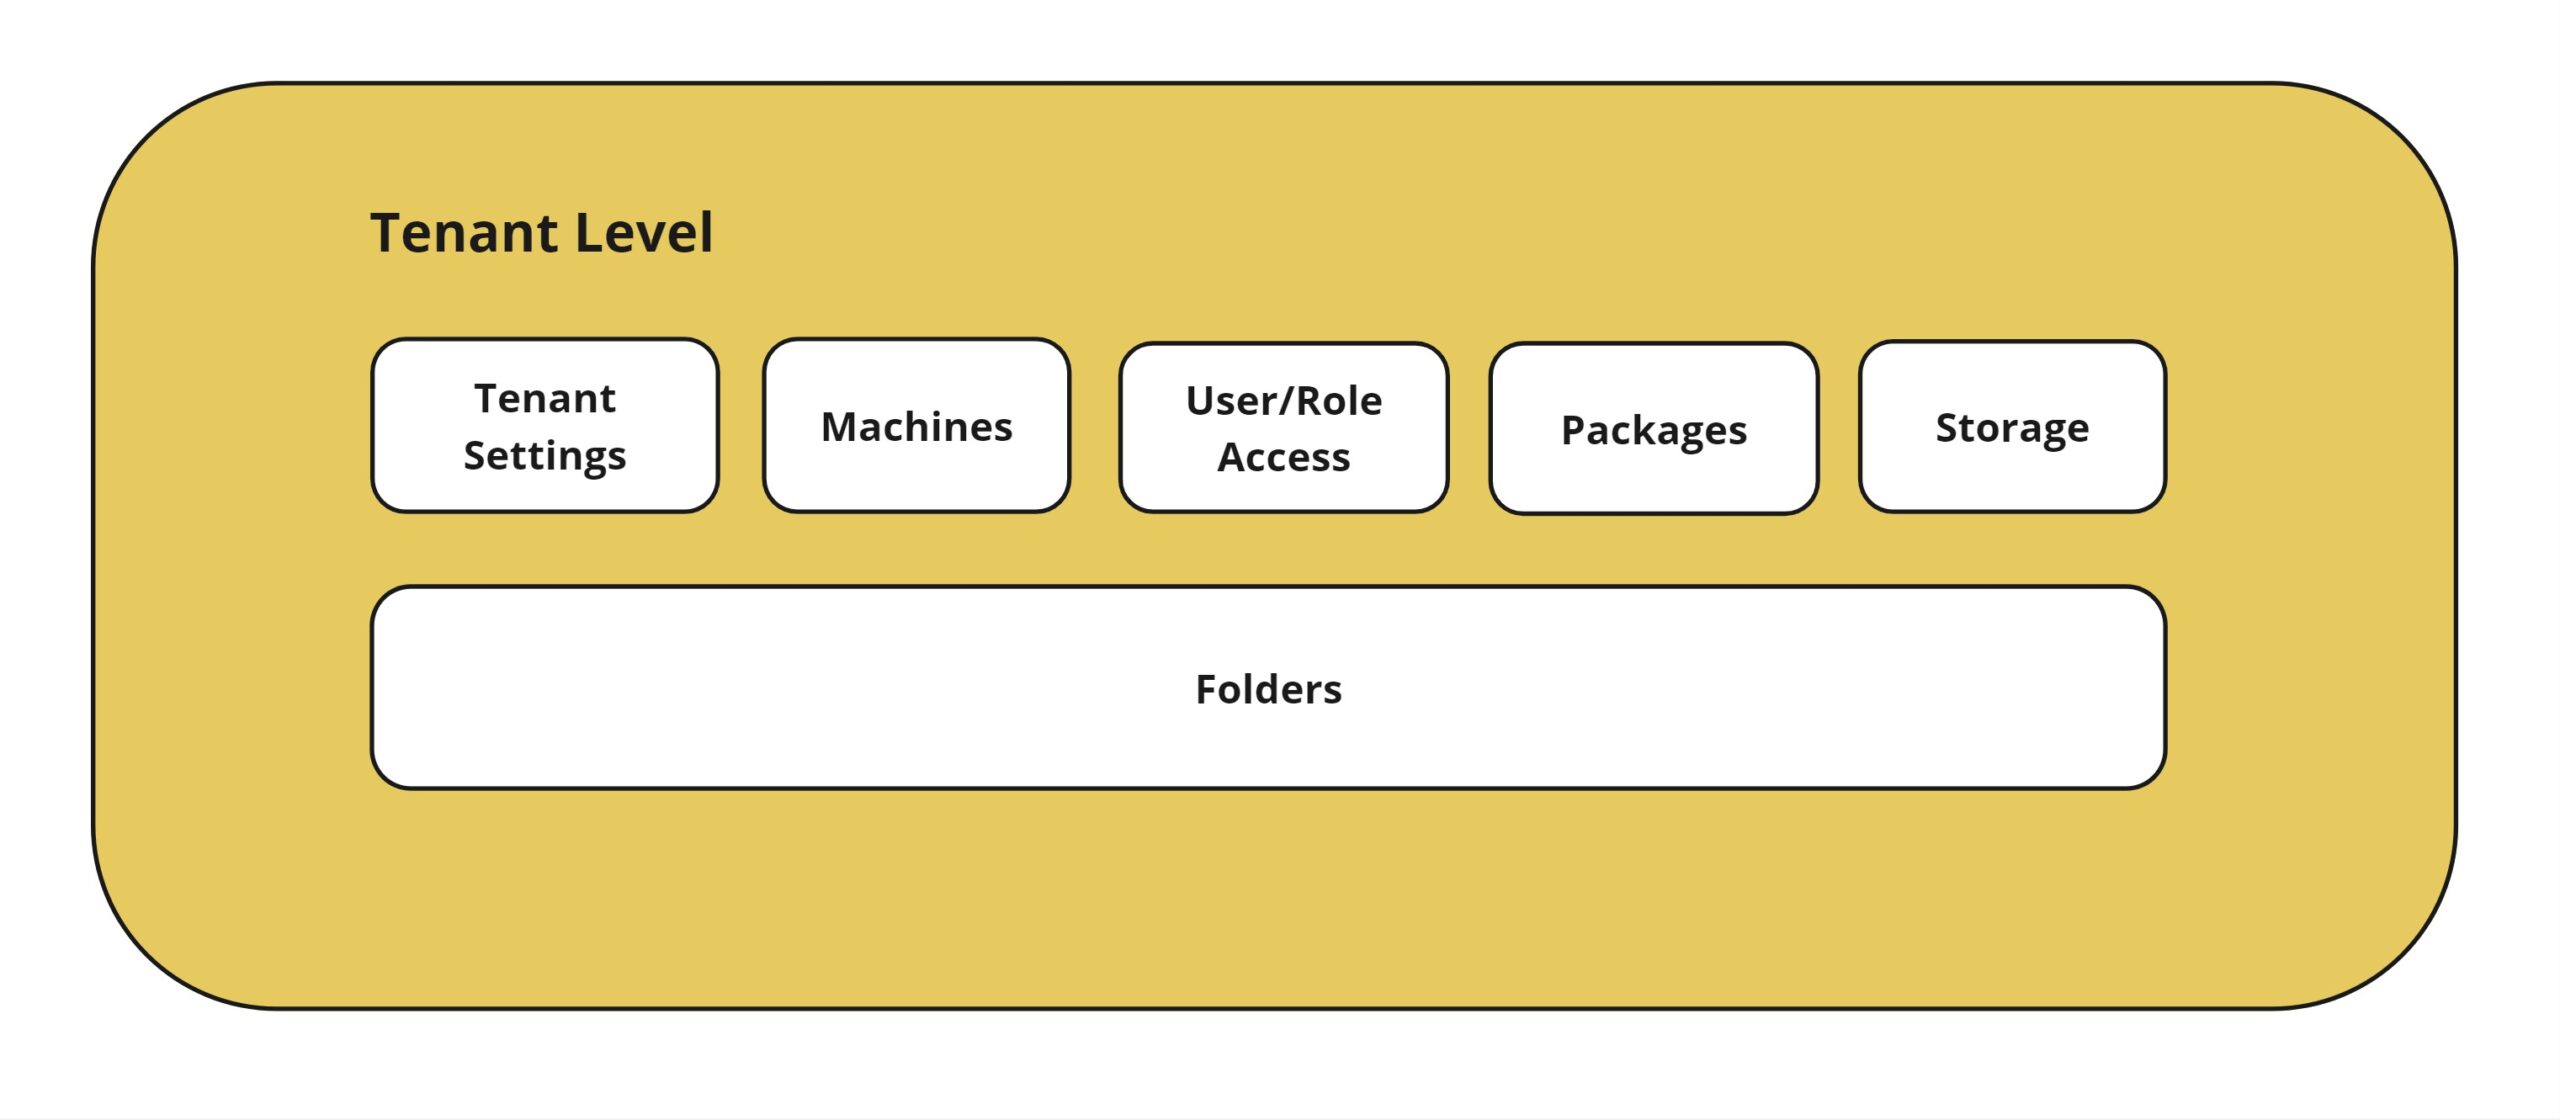
The second-level down the organizational tree is the tenant. The important thing to remember is that each tenant is a separate silo from other tenants. Therefore, user/robot accounts and roles must be specifically given access to each tenant. Each tenant is further divided up into folders, created here. It is up to the administrator how to organize tenants and folders. Each department may be its own tenant, for example, or each client. Here is where anything that will be shared across folders can be stored. Packages, or compiled automation code, which will be shared across folders, can be stored here. Tenant-level credentials, for example to a database, are stored here. Machines are set up at the tenant level.
Folder Level
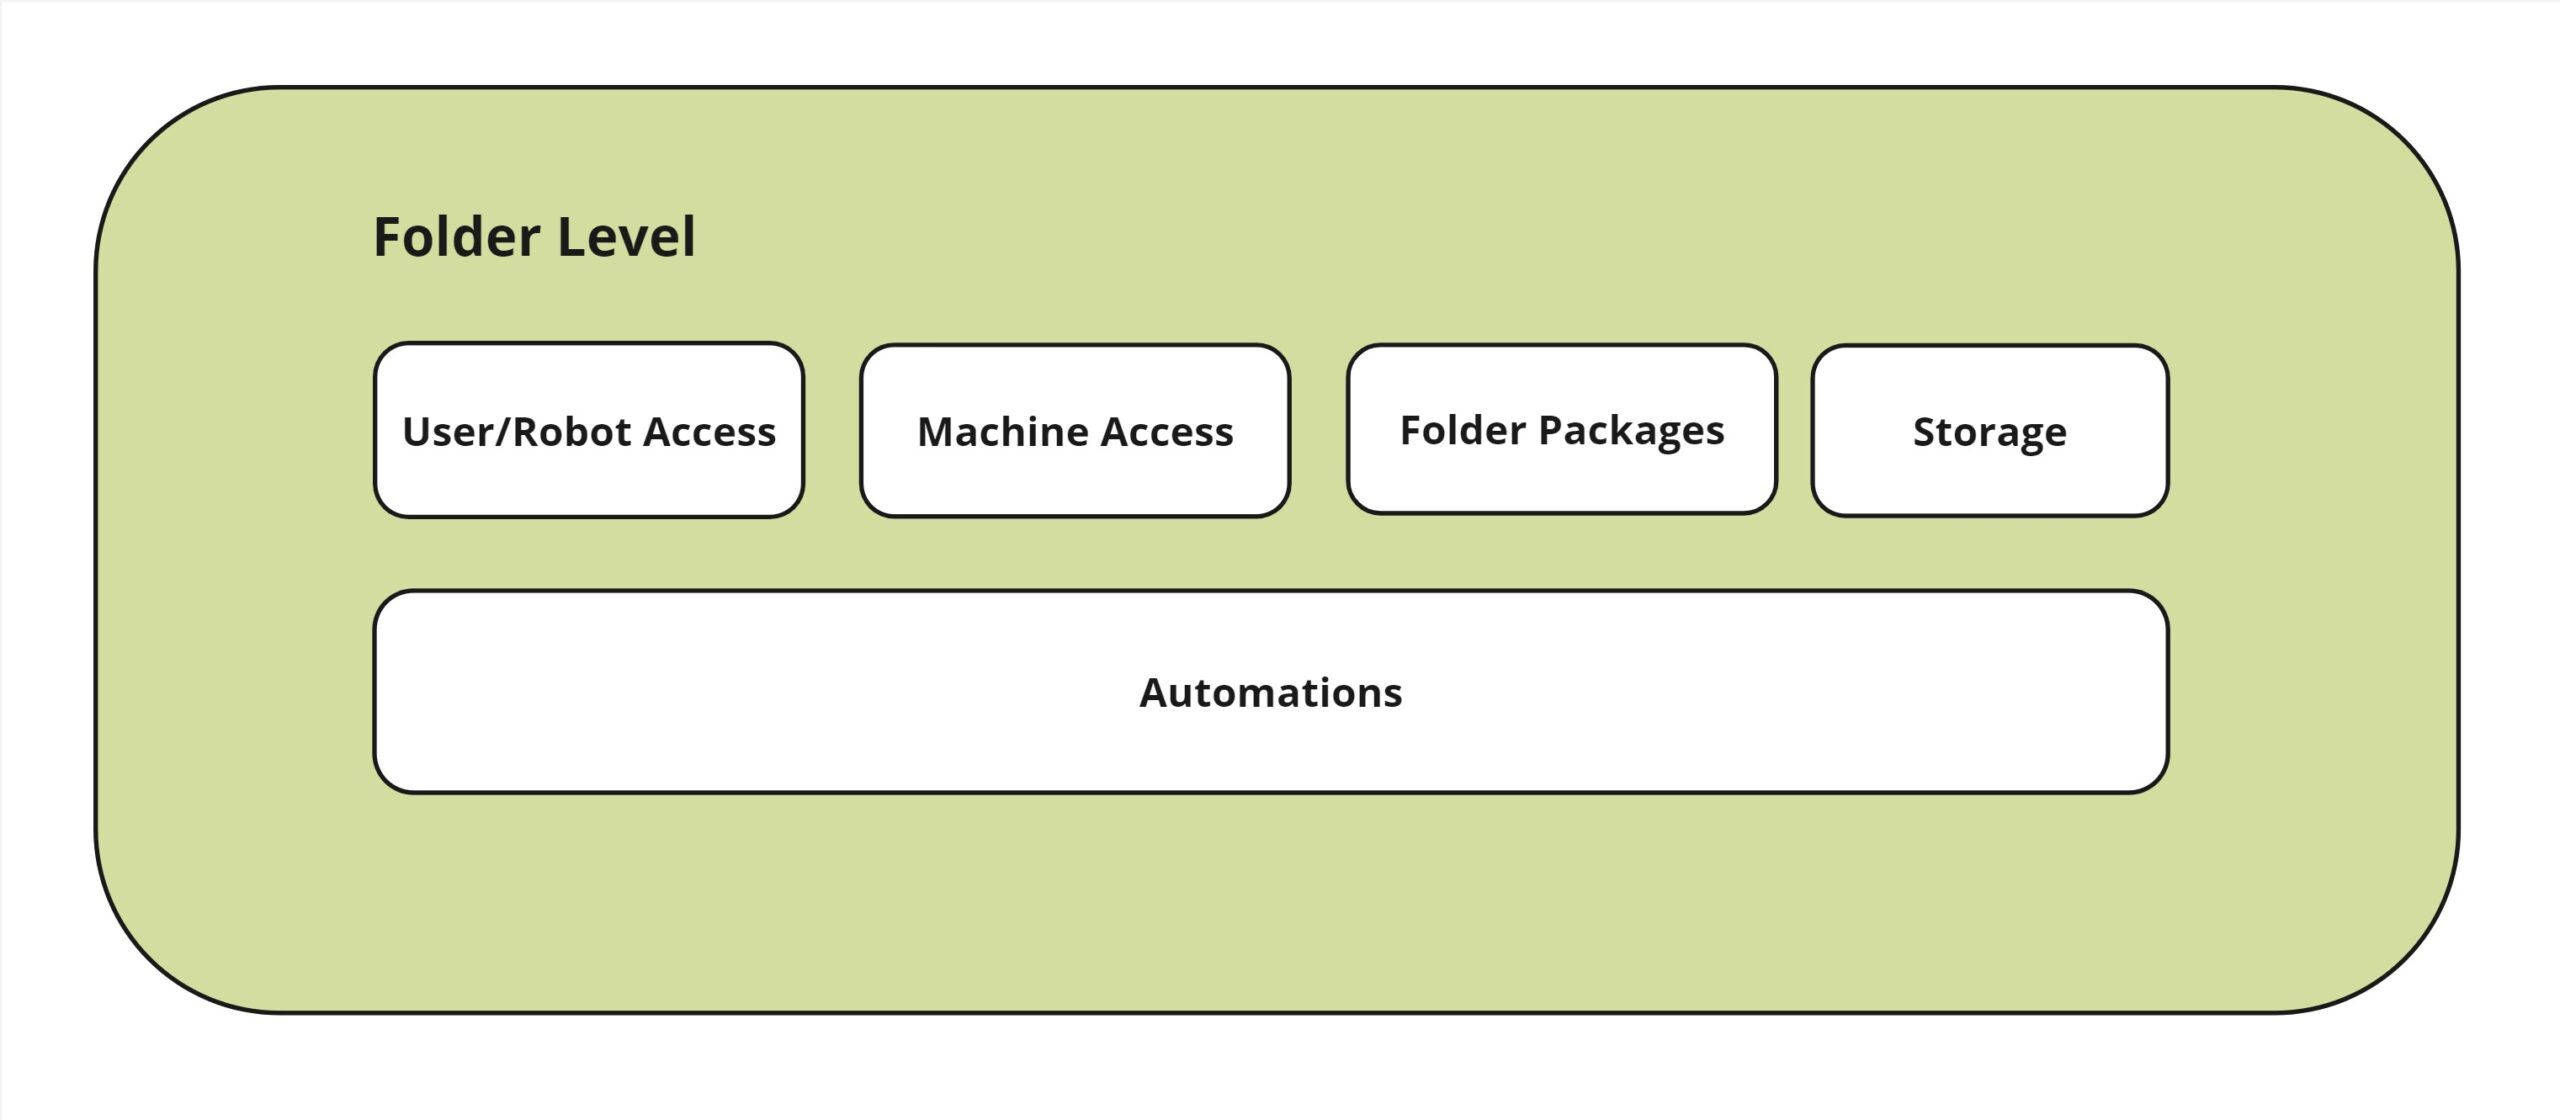
The folder level is the container level for all automations, where stuff actually happens, and any resources that the automations may need. Previously setup users/robots are specifically granted access to folders, as are machines. Here is where a package (a bunch of code) is turned into a process by assigning it to the folder and adding any input arguments necessary. Other resources can be stored at the folder level, such as assets (key-value pairs), credentials, files, and queues, which the automations may need to run. From here you access the Automations Tab which we’ll look at next.
Automation Level
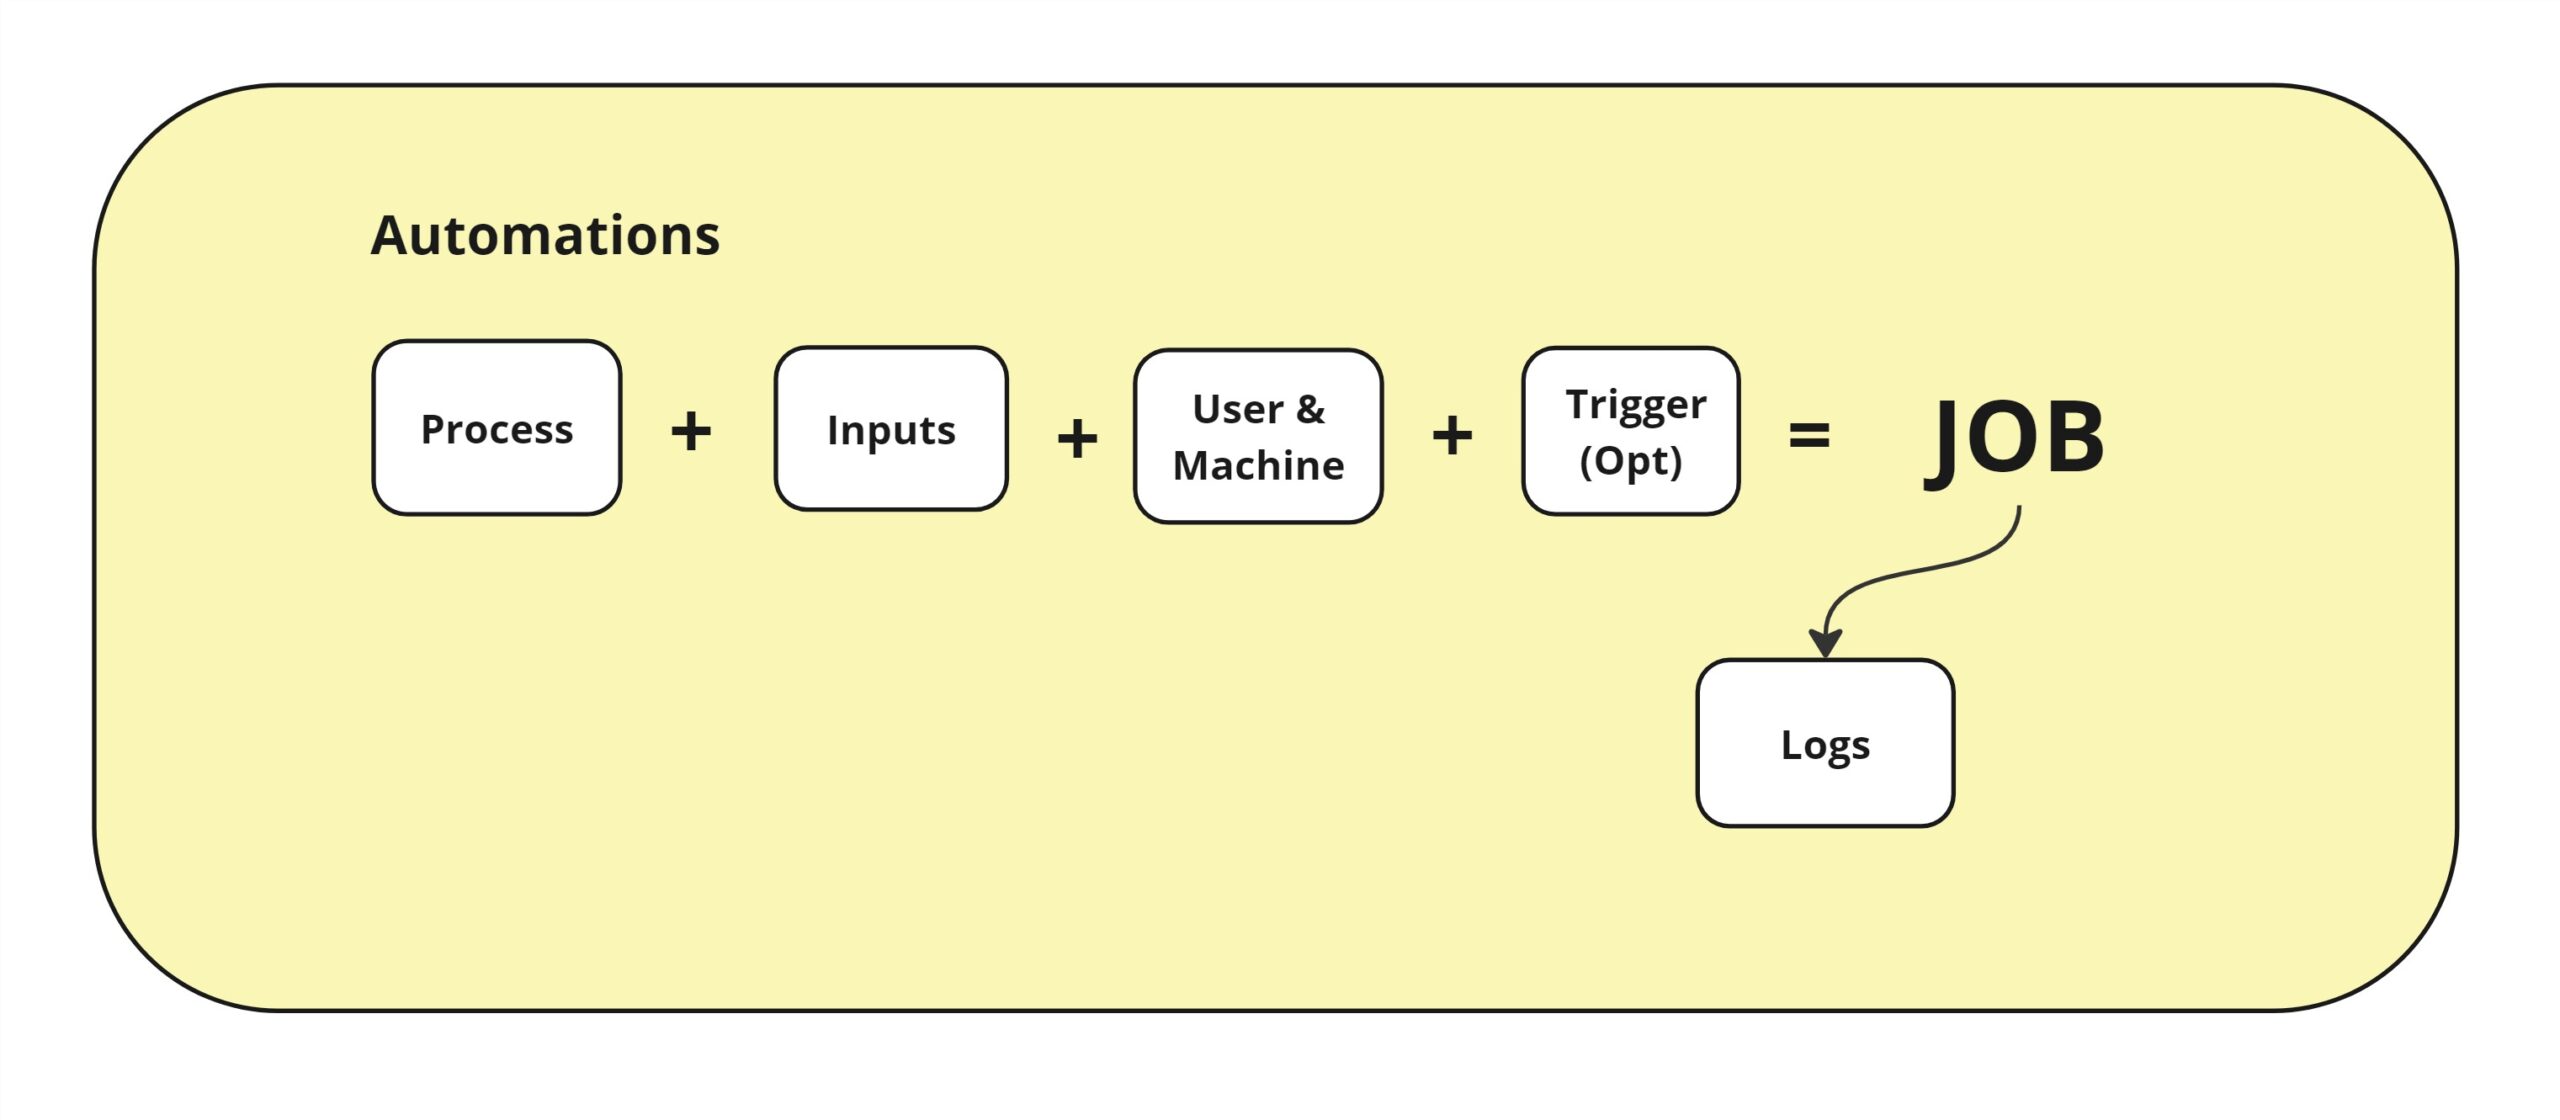
Finally, we’re at the level where stuff happens! The Automations Level (displayed as a tab at the folder level in Orchestrator) is where you can set up everything to do with a specific run of an automation, called a job. Here you select a process, set any inputs needed at runtime, set its priority, select a user account with run permissions, and machine where it is to run. Then, you can run the job. Optionally, you can create a triggered job that will run at the interval you set. Once the job starts, it is put into the job queue, and will run with other started jobs based on its priority. As the job executes, it creates job logs, which you can access here.
Orchestrator – Four Levels of Nesting
We’ve seen the underlying basic functional structure of UiPath Orchestrator, from the very top of the installation to four levels down to where stuff happens. As you learn the functionality of UiPath, always keep in mind these 4 levels of Orchestrator, and at what level the information and functionality are stored. Try to keep the logic of each level in mind. The UiPath Orchestrator UI can be confusing with various screens, tabs, lists, folder icons, etc. To try to make things easier, UiPath often puts “shortcuts” that cut through levels. But sometimes that only adds confusion for beginners. Until you have the logic of the levels firmly in mind, try to avoid shortcuts and go to the source level to add or change data. Now that you have a basic understanding of where stuff is and why, you’ll likely be able to find what you need, no matter how much UiPath fiddles with the interface in the future.